Original Link: https://www.anandtech.com/show/1619
AnandTech Guide to Better Photos: Night Photography
by Stephen Caston on February 18, 2005 12:05 AM EST- Posted in
- Digital Camera
Index
Welcome to our latest guide to better photos. This time we are going to take a look at some ideas and techniques behind night photography. Other than your digicam, one of the most important tools that you will need to take good night pictures is a way to stabilize your camera. Obviously, the easiest way to do this is with a tripod. You can get a basic tripod for about $20 from most stores that sell cameras. If you aren't a big fan of carrying around a large tripod, mini tripods can be found for under $20 that fit in your pocket or camera bag. If for some reason you really hate the idea of carrying a tripod at all, you can still take great night shots with a little creativity. For example, you could place your camera on a low wall with a flat top, your car (turn off the engine to reduce vibrations), the ground, etc. The most important thing is that your camera remain completely still during the exposure. If you are using a makeshift stabilizer, you will probably need to prop up part of the camera to get the image framed the way you want it. We've all done this before when taking group pictures with the self-timer; you can use anything that's lying around: a jacket, keys, a twig, etc. We highly recommend a tripod, though, just because it's easier to set up and keep stable.Before taking a picture, the first thing that you will want to consider is how long your exposure will be. There are several reasons for asking this question, but the most important one has to do with selecting your ISO setting. With all digital cameras, a higher ISO setting will result in more noise than a lower setting. However, the benefit of a high ISO is that it enables you to use a faster shutter speed. If you are planning on shooting a long exposure, there is no point in using a high ISO setting (unless you like the effect of a noisy image). If you really need a fast shutter speed, the chances are pretty high that you will have to increase the ISO to get an acceptable speed. Fortunately, there are some noise reduction techniques that you can use later to clean up the images (we will discuss this in a bit). In addition, many digicams today have noise reduction processing built in. Check your digicam's manual; it may appear as a menu item (Ex: NR On, Off) or as an automatic process when the shutter speed exceeds a specific length.
If your digicam offers manual exposure controls, such as aperture-priority, shutter-priority, and manual, you will find a greater degree of control over your pictures than those with Auto or "scene" modes. First, let's discuss aperture priority. In order to let in as much light as possible, you will want to set the aperture to the lowest possible setting. If you are in a bright area like a well-lit city and you want a long exposure, you may have to "stop" the aperture down (choose a higher f number) in order to achieve a slower shutter speed. However, most people prefer to use shutter-priority mode when shooting night images. With shutter-priority, you simply select the shutter speed that will give you the amount of motion (or lack thereof) that you want while the camera adjusts the aperture. Either way, you will want to make a decision about the ISO setting before shooting. Otherwise, you might be surprised to find a ton of noise ruining your otherwise beautiful night shot.
If your camera does not offer manual exposure controls, you may be at the mercy of your camera's preset shooting modes such as "night scene" or "long exposure". If the images don't look good with those preset modes, try applying an E.C. (exposure compensation) to adjust the exposure. If your camera simply doesn't allow long exposures, it might be time to invest in a more advanced model. Otherwise, you will be restricted to brighter locations and shorter shutter speeds.
You can use different white balance settings to create different effects. Unlike daylight photography, choosing the wrong white balance setting may have a desirable effect. For example, many streetlamps use tungsten lights, which give off a strong yellowish glow. If you were to set your camera to tungsten WB to correct for this yellowish cast, the resulting image may not look quite right. However, setting the camera to Auto may yield a yellowish cast that captures the scene as you remember it. Different color casts can evoke different moods in images. For example, a yellowish cast has a warming effect while a bluish cast has a cooling effect. With fluorescent light, many Auto WB systems will record a greenish cast. While you could set the camera to correct for this, you might find that it adds a certain mood to leave the color cast there. In the picture below, we prefer the warm yellow cast from the Auto WB setting as opposed to the cooler, correctly-balanced image on the right.
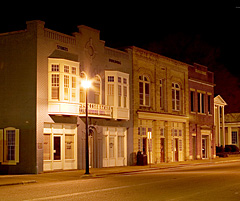 Auto WB |
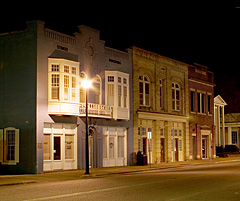 Tungsten WB |
| Click on images to enlarge. | |
If your camera has a raw recording option, we highly recommend using it for night photography. By shooting raw files, you can adjust the white balance later without compromising image quality. Now, let's take a look at noise reduction.
Take Two: Removing Hot Pixels
One of the problems that you may run into when shooting long exposures is the appearance of “hot pixels” in your images. These are pixels on the image sensor that suffer from charge leakage after being exposed to light for a certain amount of time. The effect is bright out-of-place pixels appearing throughout your images. You may notice that these hot pixels are appearing in the same places in each of your long exposures. Although this can be frustrating, there is something you can do about it. In fact, the consistency of the location of the hot pixels is beneficial because it allows us to use a method called “dark frame subtraction” in order to remove them. Some cameras will perform a dark frame subtraction automatically, but we are going to show you how to do it manually.Immediately after taking your normal long exposure frame, cover your lens and take an additional “dark” frame with the same exposure settings. A change in temperature may result in more or less hot pixels (higher temperatures result in more), so be sure to take the dark frame right after your original image. Taking the dark frame with the same exposure settings will be easiest if your camera has a manual exposure mode. Otherwise, you can try to lock the exposure before covering the lens. In some cameras, this can be done by half-pressing (and holding) the shutter button or pressing the “AE Lock” button. The idea here is that the dark frame will be used later as a map of all the hot pixels. This makes it very easy to remove them later. Now that you’ve taken your original image and a dark frame, let’s look at some ways to remove those dreadful hot pixels.
NOTE: For this section, we will be referring to steps that can be used in either Photoshop or Photoshop Elements. Photoshop is the industry standard for graphics design and likewise, it carries a hefty price tag. Photoshop Elements is a simplified version of Photoshop that offers many of the same useful features at a fraction of the cost.
- Open your original image and your dark frame.
- Select the “Move” tool from the tools palette (or press “v”).
- Click and drag the dark frame over into your original image while holding down the Shift key. By holding Shift, the dark frame will center itself automatically on top of your original image. This is important so that the hot pixels will be aligned perfectly in both images.
- On the layers palette, change the blend mode of the dark frame layer to “Difference”. At this point, you should no longer see the hot pixels in your image. You can adjust the Opacity of the dark frame layer until the image looks good to you.
| Dark Frame Subtraction (200% crops) |
||
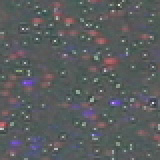 Original image |
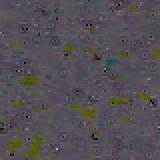 Dark frame at 100% opacity |
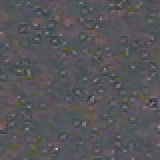 Dark frame at 50% opacity |
In the 200% crops above, we have demonstrated a dark frame subtraction. The original image suffers from a high frequency of blue and red blobs. In the second crop, we added the dark frame layer and set the blend mode to “Difference”. With the opacity at 100%, you can see that the blue and red blobs are gone. However, in their place are dark pits and greenish blobs. By setting the opacity to 50%, we were able to find a good balance to produce a much cleaner image. As we stated before, temperature plays a large role in the amount of hot pixels that will occur. Even so, each sensor will be different and consumer digicams tend to suffer from hot pixels more than prosumer and professional models.
Night Portraits and More Ideas
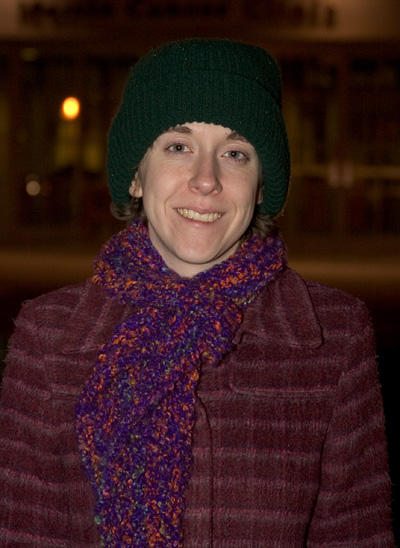
When taking a picture of someone in a relatively dark setting (inside or outside), you should be aware of a special flash setting that most digicams offer called “slow sync”. With slow-sync disabled, a flash will fire typically with a shutter speed of 1/60th – 1/200th sec. or so (depending on the camera). This relatively fast-sync flash is what most cameras will use by default and it works well for illuminating your subject’s face. Unfortunately, even 1/60th sec. is typically not enough time for the dim background light to be captured by your camera’s sensor. The result is that your subject is illuminated, but everything behind him/her is dark. To get a more well-balanced picture with lighting detail on your subject and in the background, enable your camera’s slow-sync flash option. A slow-sync flash does just what it sounds like. The flash itself will fire for the same duration, but the shutter speed will be slower. Some advanced cameras even allow you to specify when the flash will fire – with the first shutter curtain or the second. The difference between the two will be important if your subject is moving. For example, with the flash synced with the first shutter curtain, the flash will illuminate your subject right when the shutter opens. Then, the camera will capture the ambient light, resulting in a trail of light in front of the subject. The second shutter curtain is usually more desirable because it leaves a motion trail behind the subject, resulting in a natural-looking path of motion. For general portrait purposes, either setting will work. In the example below, the original image was taken in Program mode (1/60th sec., f/5.0), while the rollover image was taken in Aperture-priority (0.3 sec., f/5.0). Hold your mouse over the image to see the dramatic difference when a slow-sync flash is used.In order for a slow-sync flash picture to be effective, it is absolutely necessary that the camera and the subject remain very still during the exposure. Even so, it is hard to take successful slow-sync shots that are much longer than a couple seconds unless your subject has a talent for holding very still.
Because stabilizing the camera is so important for longer exposures, we wanted to mention a couple of important points about this. If at all possible, you should always avoid having to touch the camera during an exposure. If you don’t have a cable release to trip the shutter, another great way to avoid camera movement is to use the self-timer. Simply set the self-timer to the shortest length and press the shutter button. Then remove your hands from the camera and let it stabilize before the shutter opens. If you own a digital SLR, your camera might have the option to enable mirror lock-up. Because the mirror has to physically move before an exposure, sometimes the vibrations can affect the clarity of the image. Enabling mirror lock-up causes the mirror to flip up and stabilize prior to the actual exposure. This ensures that any vibrations caused by the mirror will have ceased by the time that the shutter opens.
If you are taking a picture of a distant landscape, check to see if your camera has an “infinity focus” setting (or focus to infinity using manual focus). This will not only make sure that your image will be in focus, but it will spare you the annoyance of waiting for your camera’s auto-focus system to find a focus point. If your camera has the option, once you have achieved the focus that you want, disable the auto-focus system. Now, you can take several pictures without waiting for the camera to refocus for each shot. Another tip is to use AE (auto-exposure) bracketing if it is available. With AE bracketing, a camera can take multiple versions of a picture, each with different exposure values. This can be a lifesaver for night photography when it is hard to judge if an image is exposed properly by viewing the LCD monitor.
Capturing Motion
One of the great things about night photography is using long exposures to create interesting effects. By exposing a scene for a couple seconds or more, you can capture images that we cannot see with our naked eyes. One of the most commonly-used ways to exploit this phenomenon is by taking long exposures of moving cars.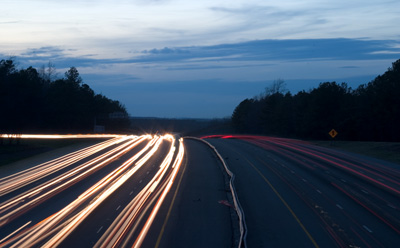
(10 sec., f/25, ISO 100)
Click to enlarge.
In the example above, we took a 10-second exposure while standing on an overpass above I-40. By taking the picture just after the sun went down, we were able to capture some detail in the sky.
If you ever get bored, another cool thing to do is to face your camera towards you. Set the camera to a long exposure and step back several feet. Then, use a flashlight, lighter, etc. to "draw" in the air. Check the results and tweak the aperture setting until you can get good clean results. There are people such as Tokihiro Sato who have turned this into an interesting form of photo art. We highly recommend experimenting with this because there are a lot of really creative things that you can do.
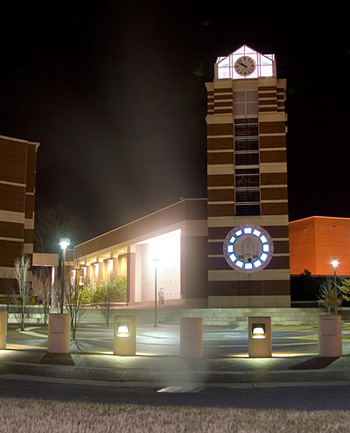
(10 sec, f/5.6, ISO 100)
Click to enlarge.
When you are looking for good, long exposure opportunities, keep an eye out for any kind of movement. The results can make your images seem a bit unreal. In the example above, the steam coming from the grate in the bottom center of the frame adds a mystical quality to the image. Over the course of the 10-second exposure, the steam created the effect of a ghostly figure rising from the ground.
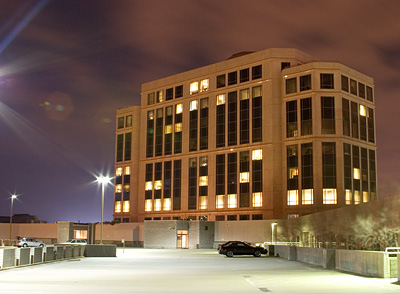
(30 sec., f/16, ISO 400)
Click to enlarge.
In the picture above, the clouds were moving at a slow pace. After exposing the frame for 30 seconds, the clouds smoothed out creating a soft surreal effect (it almost looks like a parallax sky from Duke3d). If we had exposed this image for much longer, the detail in the clouds would have been lost.
Photographing the night sky is something that can be very rewarding, but it requires a lot of patience. Of course, you will want to use your camera's lowest ISO setting and experiment with different exposure times. However, one of the biggest problems with taking pictures of the sky is light pollution. Light pollution is most frequently caused by city lights shining into the sky. The result is that your sky images are going to be very bright when they are exposed for a long period of time. Below is an example
| Light Pollution |
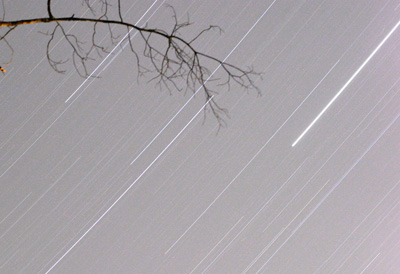 (60 min., f/5.6, ISO 100) Click to enlarge. |
In the picture above, our star image suffers from strong light pollution even though the sky looked pitch black and we were 30 miles from Raleigh, NC in a fairly rural town. If you are looking to capture anything in the sky with a long exposure, make sure that you are very far from any major cities or other sources of light pollution.
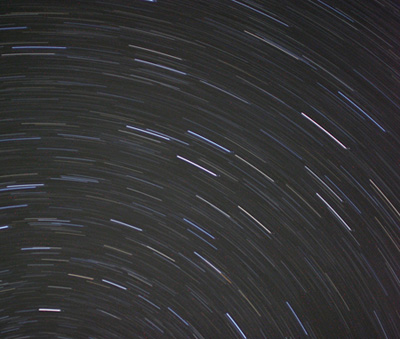
(30 min., f/2.5, ISO 100)
Click to enlarge.
In the example above, we found ourselves far from civilization in the wilderness of Maine. With a 30-minute exposure, we were able to capture an interesting pattern of movement.
We hope that this guide has inspired you to experiment with the fun of night photography. If you have tried before and the results weren't as good as you had expected, don't give up. Just keep an eye on your settings and shoot in several different locations. Night photography is no different from any other kind of photography in the sense that there seems to be no end to the possibilities. Once you have the technique down, the hardest part is to use your creativity to see beyond what is in front of your eyes. A long exposure can create interesting and dramatic effects with a seemingly "normal" subject. Good luck and the next time you have the urge to take pictures, don't let the night stop you!

