Revisiting Linux Part 1: A Look at Ubuntu 8.04
by Ryan Smith on August 26, 2009 12:00 AM EST- Posted in
- Linux
Installation
In terms of difficulty, right up there with making a good GUI is making a good installer. History is riddled with bad OS installers, with pre-Vista Windows being the most well-known example. Text mode installers running on severely castrated operating systems reigned for far too long. Microsoft of course improved this with Windows Vista in 2006, but even as late as the end of 2007 they were still releasing new operating systems such as Windows Home Server that used a partial text mode installer.
The reason I bring this up is that good OS installers are still a relatively recent development in the PC space, which is all the more reason I am very impressed with Ubuntu’s installer. It’s the opposite of the above, and more.
Right now Ubuntu is the underdog in a Windows dominated world, and their installation & distribution strategies have thusly been based on this. It’s undoubtedly a smart choice, because if Ubuntu wiped out Windows like Windows does Ubuntu, it would be neigh impossible to get anyone to try it out since “try out” and “make it so you can’t boot Windows” are mutually incompatible. Ubuntu plays their position very well in a few different ways.
First and foremost, the Ubuntu installation CD is not just an installer, but a live CD. It’s a fully bootable and usable copy of Ubuntu that runs off of the CD and does not require any kind of installation. The limitations of this are obvious since you can’t install additional software and CD disc access times are more than an order of magnitude above that of a hard drive, but nevertheless it enables you to give Ubuntu a cursory glance to see how it works, without needing to install anything. Live CDs aren’t anything new for Linux as a whole, but it bears mentioning, it’s an excellent strategy for letting people try out the OS.
This also gives Ubuntu a backdoor in to Windows users’ computers because as a complete CD-bootable OS, it can be used to recover trashed Windows installations when the Windows recovery agent can’t get the job done. It can read NTFS drives out of the box, allowing users to back up anything they read to another drive, such as USB flash drive. It also has a pretty good graphical partition editor, GParted, for when worse comes to worse and it comes time to start formatting. Ubuntu Live CD is not a complete recovery kit in and of itself (e.g. it can’t clean malware infections, so it’s more of a tool of last resort) but it’s a tool that has a purpose and serves it well.
Better yet, once you decide that you want to try an installable version of Ubuntu, but don’t want to take the plunge of messing with partitions, Ubuntu has a solution for that too. Wubi, the Windows-based Ubuntu Installer, allows you to install Ubuntu as a flat-file on an existing NTFS partition. Ubuntu can then boot off of the flat file, having never touched a partition or the master boot record (instead inserting an Ubuntu entry in to Windows BCD). This brings all the advantages of moving up from a Live CD to an installable version of Ubuntu, but without the system changes and absolute commitment a full install entails. Wubi installations are also easily removable, which further drives home this point.
Now the catch with a Wubi installation is that it’s meant to be a halfway house between a Live CD and a full installation, and it’s not necessarily meant for full-time use. As a flat file inside of a NTFS partition, there are performance issues related to the lower performance of the NTFS-3G driver over raw hard drive access, along with both external fragmentation of the flat file and internal fragmentation inside of the flat file. An unclean shutdown also runs the slight risk of introducing corruption in to the flat file or the NTFS file system, something the Wubi documentation makes sure to point out. As such Wubi is a great way to try out Ubuntu, but a poor way to continue using it.
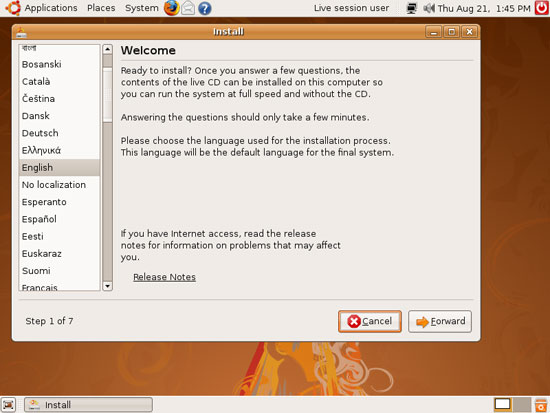
Finally, once you’ve decided to go the full distance, there’s the complete Ubuntu installation procedure. As we’ve previously mentioned Ubuntu is a live CD, so installing Ubuntu first entails booting up the live CD – this is in our experience a bit slower than booting up a pared down installation-only OS environment such as Vista’s Windows PE. It should be noted that although you can use GParted at this point to make space to install Ubuntu, this is something that’s better left in the hands of Windows and its own partition shrinking ability due to some gotchas in that Windows can move files around to make space when GParted can’t.
Once the installation procedure starts, it’s just 6 steps to install the OS: Language, Time Zone, Keyboard Layout, Installation Location, and the credentials for the initial account. Notably the installation procedure calls for 7 steps, but I’ve only ever encountered 6, step 6 is always skipped. This puts it somewhere behind Mac OS X (which is composed of picking a partition and installing, credentials are handled later) and well ahead of Windows since you don’t need a damn key.
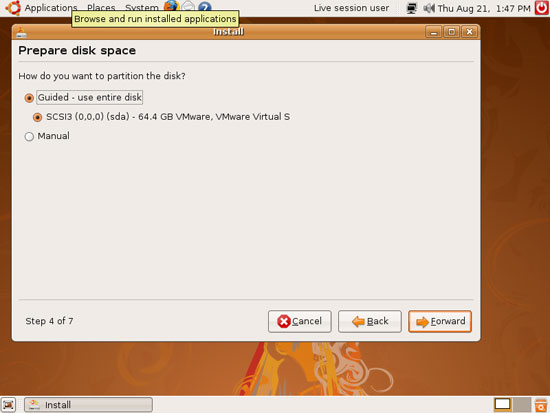
The only thing about the Ubuntu installation procedure that ruffles my feathers is that it doesn’t do a very good job of simplifying the installation when you want to install on a new partition but it’s not the only empty partition. This is an artifact of how Linux handles its swapfile – while Windows and Mac OS X create a file on the same partition as the OS, Linux keeps its swapfile on a separate partition. There are some good reasons for doing this such as preventing fragmentation of the swapfile and always being able to place it after the OS (which puts it further out on the disk, for higher transfer rates) but the cost is ease of installation. Ubuntu’s easy installation modes are for when you want to install to a drive (and wipe away its contents in the process) or when you want to install in the largest empty chunk of unpartitioned space. Otherwise, you must play with GParted as part of the installation procedure.
This means the most efficient way to install Ubuntu if you aren’t installing on an entire disk or immediately have a single free chunk of space (and it’s the largest ) is to play with partitions ahead of time so that the area you wish to install to is the largest free area. It’s a roundabout way to install Ubuntu and can be particularly inconvenient if you’re setting up a fresh computer and intend to do more than just dual boot.
Once all of the steps are completed, Ubuntu begins installing and is over in a few minutes. Upon completion Ubuntu installs its bootloader of choice, GRUB, and quickly searches for other OS installations (primarily Windows) and adds those entries to the GRUB bootloader menu. When this is done, the customary reboot occurs and when the system comes back up you’re faced with the GRUB boot menu – you’re ready to use Ubuntu. Ubuntu doesn’t treat its first booting as anything special, and there are no welcome or registration screens to deal with(I’m looking at you, Apple). It boots up, and you can begin using it immediately. It’s refreshing, to say the least.
The actual amount of time required to install Ubuntu is only on the order of a few minutes, thanks in large part due to its dainty size. Ubuntu comes on a completely filled CD, weighing in at 700MB, while Windows Vista is on a DVD-5 at over 3GB, and Mac OS X is on a whopping DVD-9 at nearly 8GB. It’s the fast to download (not that you can download Windows/Mac OS X) and fast to install.
We’ll get to the applications in-depth in a bit, but I’d like to quickly touch on the default installation of Ubuntu. Inside that 700MB is not only the core components of the OS and a web browser, but the complete Open Office suite and Evolution email client too. You can literally install Ubuntu and do most common tasks without ever needing to install anything else beyond security and application updates. Consider the amount of time it takes to install Microsoft Office on a Windows machine or a Mac, and it’s that much more time saved. Canonical is getting the most out of the 700MB a CD can hold.


195 Comments
View All Comments
jasperjones - Wednesday, August 26, 2009 - link
I second most of Fox5's suggestion.1.) I've been completely ignorant of software development on Windows over the last few years. Comparison of MS Visual Studio vs Eclipse or vs Netbeans/Sun Studio? How fast are CLI C++ apps on Windows vs. Linux? Perhaps using both GNU and Intel C++ Compiler toolchains on Linux. And possibly MS Visual C++ and Intel Visual C++ on Windows.
Perhaps less esoteric, 2.) instead of benching SMB/CIFS on Windows vs Samba on *nix, bench something *nix native such as scp/sftp or nfs. Netperf.
3.) Number-crunching stuff. I guess this is sort of similar to running at least a few synthetic benches. LINPACK or some other test that uses BLAS or LAPACK, tests that use FFTW. Maybe even SPEC (I wouldn't expect any exciting results here, though, or are there?)
Eeqmcsq - Wednesday, August 26, 2009 - link
Are you looking for benchmarks in Windows vs Ubuntu with the same hardware? Or benchmarks in different CPUs/motherboards/etc with the same Ubuntu?Ryan Smith - Wednesday, August 26, 2009 - link
Cross-platform. There's no problem coming up with Linux-only benchmarks for hardware.Eeqmcsq - Wednesday, August 26, 2009 - link
I have a question about your benchmarks that involve files, such as copying and zipping. When you run your benchmarks, do you run them multiple times and then get an average? I ask that because I have learned that in Linux, files get cached into memory, so subsequent runs will appear faster. I suspect the same thing happens in Windows. Do you take that into account by clearing cached memory before each run?Ryan Smith - Wednesday, August 26, 2009 - link
We reboot between runs to avoid cache issues (and in the case of Windows, wait for it to finish filling the SuperFetch cache).fri2219 - Wednesday, August 26, 2009 - link
I heard Sony is coming out with this thing they call a Walkman.You should review that next!
StuckMojo - Wednesday, August 26, 2009 - link
ROFL!Fox5 - Wednesday, August 26, 2009 - link
The LTS is really for the same types of people that avoid grabbing the latest MS service pack. IE, anyone who's still running Windows XP SP2 with IE6. Do that comparison and see how they compare.Ubuntu is little more than a tight integration of many well-tested packages, there's no reason to go with ubuntu's LTS when everything else already goes through it's own extensive testing. Given how quickly open source software advances, I'd say the LTS is probably less stable than the most up to date versions, and certainly far behind on usability.
You want the equivalent of Ubuntu's LTS in Windows? It most closely matches the progression that the Windows server versions follow.
Ryan Smith - Wednesday, August 26, 2009 - link
To put things in perspective, 8.04 was released shortly after Vista SP1 and XP SP3 were. So Hardy vs. XP SP2 (a 4 year old SP) is a pretty poor comparison.You'll see an up to date comparison in part 2 when we look at 9.04.
awaken688 - Wednesday, August 26, 2009 - link
I'm glad you did this article. It really has been something I think about. I'm ready to read your Part II. As others have mentioned, I have a couple of other articles that would be great.1) The comparison of the various versions as mentioned. SuSe, Ubuntu 9.04, BSD, etc...
2) Someone mentioned VirtualBox. I'd love to hear more about this including a detailed setup for the normal user. I'd love to be able to surf while in Linux, but able to play games in Windows and keep them separate for added security.
Thanks for the article! Hope to see one or both of the ideas mentioned above covered.